This August and early September we worked on our largest project to date, the restoration of four large monuments at the General Protestant Cemetery in St. John’s. These markers were selected for restoration because of their obvious need for repair, as well as being significant figures in the history of St. John’s. It was really exciting, and we’re excited to share some of the results with you all!
(we’ll be spending the rest of fall catching up on our project posts!)
For this project, local historian Suzanne Sexty worked with the cemetery’s Board t o identify significant gravestones which were in need of some restoration. Four markers were selected for our help, three of which were metal and one was zinc, otherwise known as white bronze!
The Parsons Monument
This monument, made from zinc, is dedicated to Isabell Parsons. Unfortunately this marker is partially grown over at the base by the very tree that is causing it to lean outwards, and cannot be moved without machinery. Neither myself or Ian are metal workers either, so we did not undertaking the cold soldering required to reattached the large zinc urn to the top of the monument. What we could do, however, was prepare the new foundation area for the marker to be moved to at the later date by machinery! We achieved this by digging out a level footing area, filling it partially with levelled and tamped crusher dust, and then adding MonuGrid in order to provide a stable and level foundation for the marker. It’s all ready to be moved onto its new home!

The Parsons monument with a new foundation in front 
View of the new foundation from above
The McCracken Chest Tomb
This monument was quite the undertaking for us, a team of two! The monstrous marble chest tomb, called this because it is shaped like a large chest or box, is dedicated to Andrew McCracken by his brother. Suzanne hasn’t been able to find much about McCracken in her research, but told us that he may have been a ship’s captain, and that McCracken isn’t a Newfoundland family name.
The chest tomb was in multiple, broken pieces when we arrived, so the first thing to do was move the fallen tablet gravestone beside the tomb to make room for all the pieces (don’t worry, we came back and fixed that stone afterwards as well). The interior of the chest tomb was filled with pieces of old bricks, and as we moved them we soon discovered that there was a marble base for the monument below! This is rather rare and was exciting to see. The entire monument seemed to have been put together like a puzzle, with numbers on all the pillars and footings carved into the top and bottom of the marker, and all pieces fitting snuggly together.

The chest tomb before restoration. Note the broken pieces! 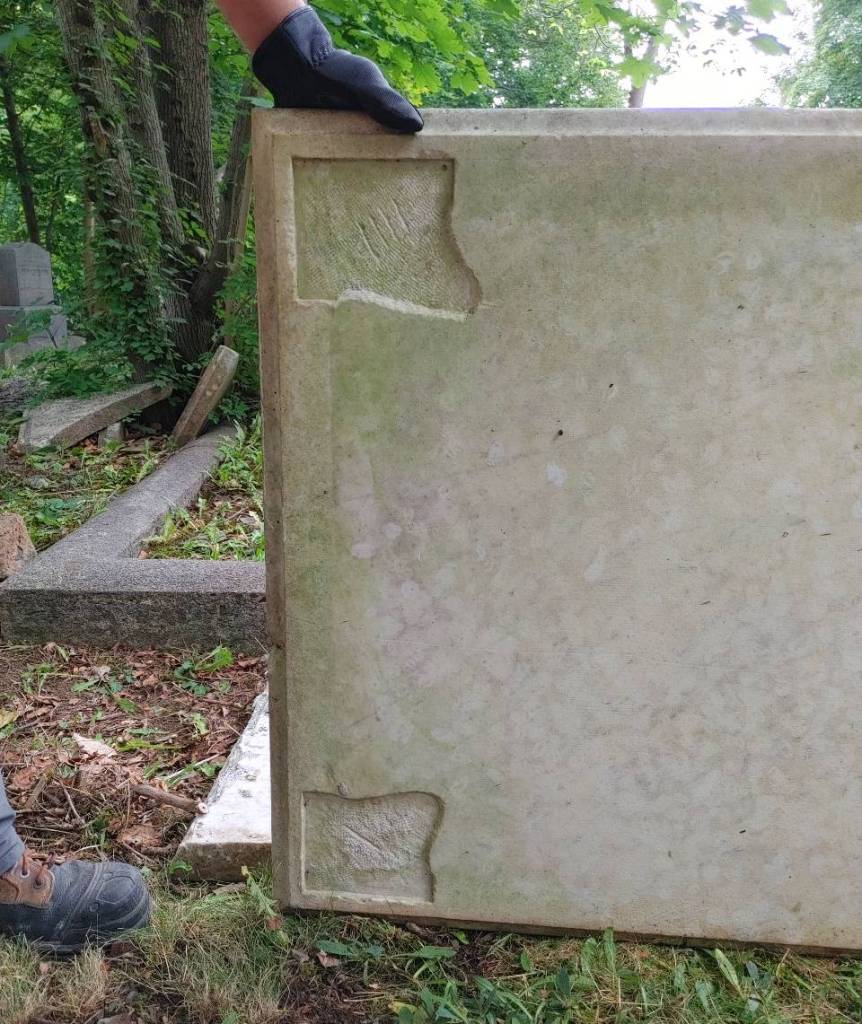
Underside of the top ledger, with footings and numbers.
After deconstructing the monument, we set about cleaning everything with water and D/2, and removing as much of the concrete from a previous repair job from the pillars as we could. As we’ve discussed before, we could only remove so much concrete without losing the marble it was attached to as well. This would result in some of the joints not fitting back together as well as we would have liked, but meant less loss of original material!
After we pried the base up from the ground, unfortunately in two pieces because it was stuck under the tree and a portion was unable to be recovered, we got a chance to see the original top of the brick-lined grave shaft! It is likely that the bricks inside the monument itself were leftovers! We then levelled everything with tamped crusher dust and got the base reset. That what the biggest struggle really, and from there it was a matter of rebuilding the monument using the handing guide that the original gravestone carvers left for us. The worst piece was the back panel, as it was in the best shape, and therefore the largest and heaviest! After we got the walls and pillars back in place and secured with some stone epoxy, we replaced the loose bricks inside, and moved the ledger pieces back into place. Once the epoxy had all set, we filled in the breaks and cracks using lime mortar, and viola!
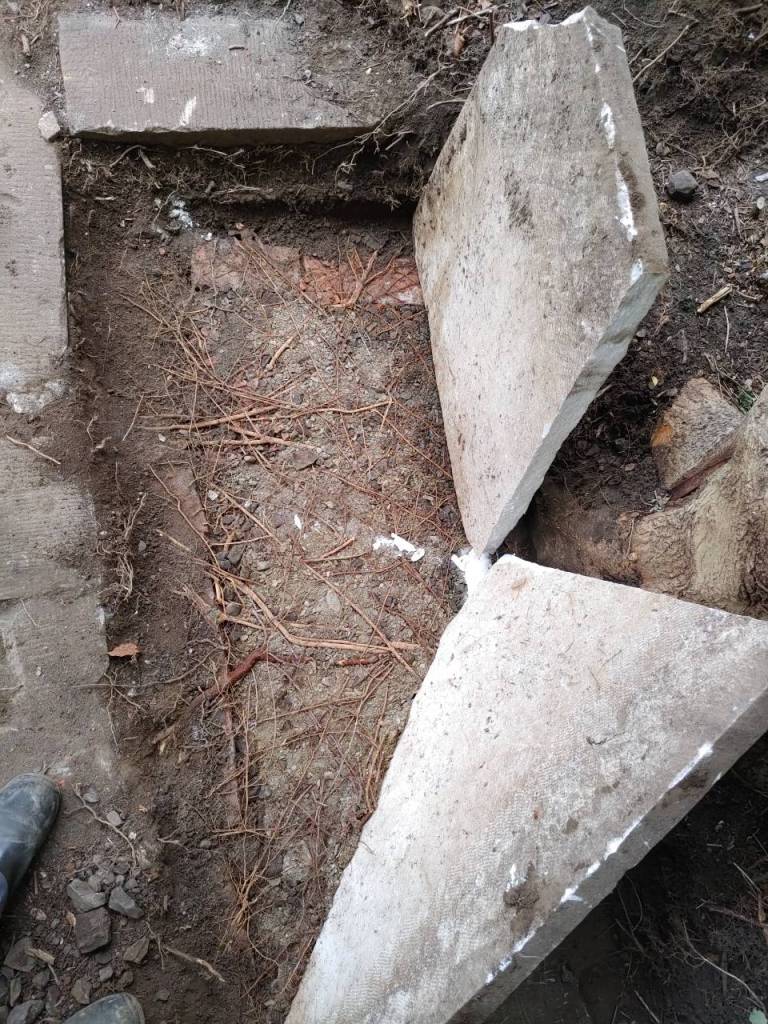
Top of the brick grave shaft 
Robyn working inside the walls 
The completed chest tomb! 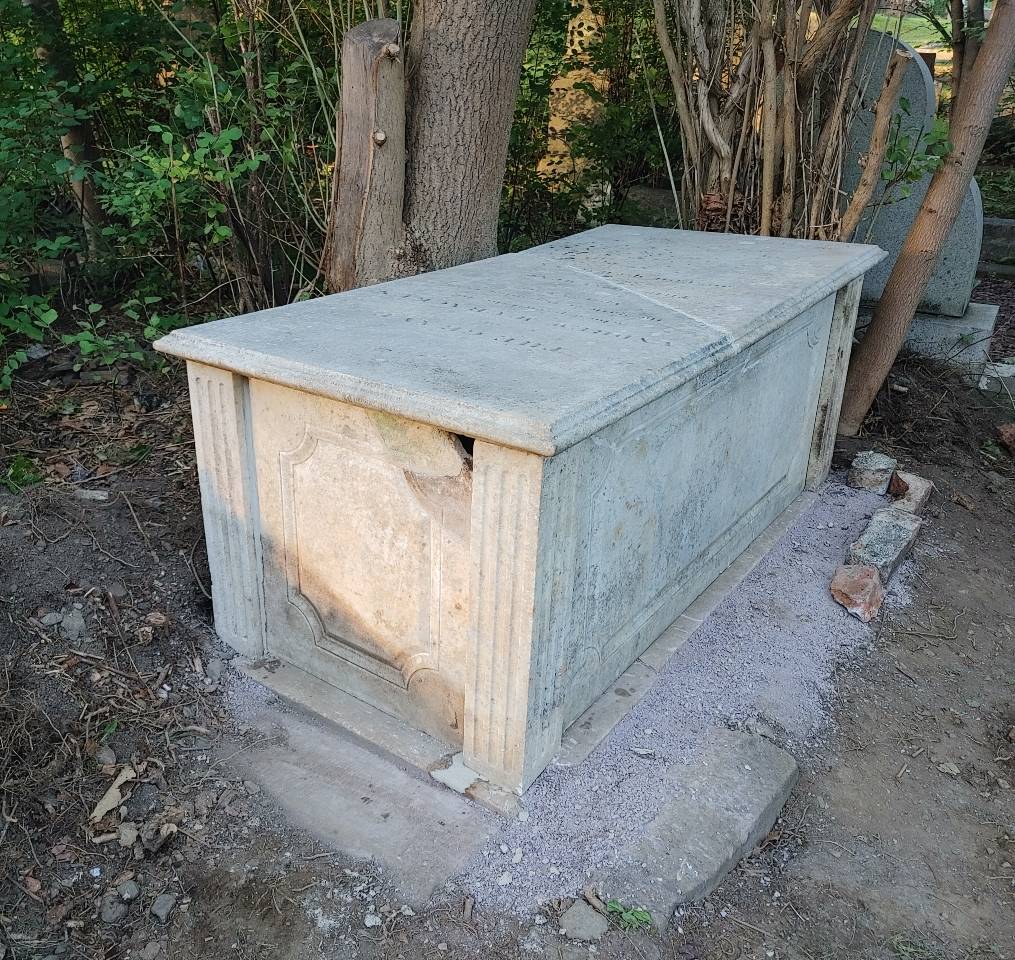
Corner view of the completed chest tomb!
The Thorburn Monument
The Thorburn Monument was completely overgrown when we got to it. This monument, to Sir Robert Thorburn, former Premier of Newfoundland, and his wife Lady Susanna Janetta Thorburn, who played a major roll in the women’s suffragette movement in the province. Their monument had seen several periods of restoration over the years, and the angel statue that once sat on top of the capped pillar monument was broken into several pieces and laying face-down at the back of the plot.
Our first task was to cut back the trees and bushes so we could actually get to the monument. You can see the angel at the back of the plot in the photo on the left below. Once we got the bushes out of the way, we moved all the pieces of the angel to the front of the plot so we could work on them easily. Unfortunately we discovered that most of this plot included an ant nest, so we ended up getting a lot of ant bites while working on this project! We cleaned the angel with D/2, water, and soft-bristled brushes, and set in a new base with Monugrid to the left of the monument after discussing the placement of the statue with the client (we couldn’t lift it up & machinery won’t fit in there, so we set it on the ground!).
Reattaching the broken wing was actually the hardest part, because we had to do it last and sit there for over an hour, holding it carefully in place, while the epoxy set enough to tie the wing up to finish setting. We cleaned the pillar, used a soft rubber mallet to reset some of the peeling lead lettering of the inscription, and made sure all cracks in the angel were filled with limestone mortar to fix the appearance of the marker, while protecting the exposed interior from the elements. It looks so completely different now!

Thorburn Monument before restoration 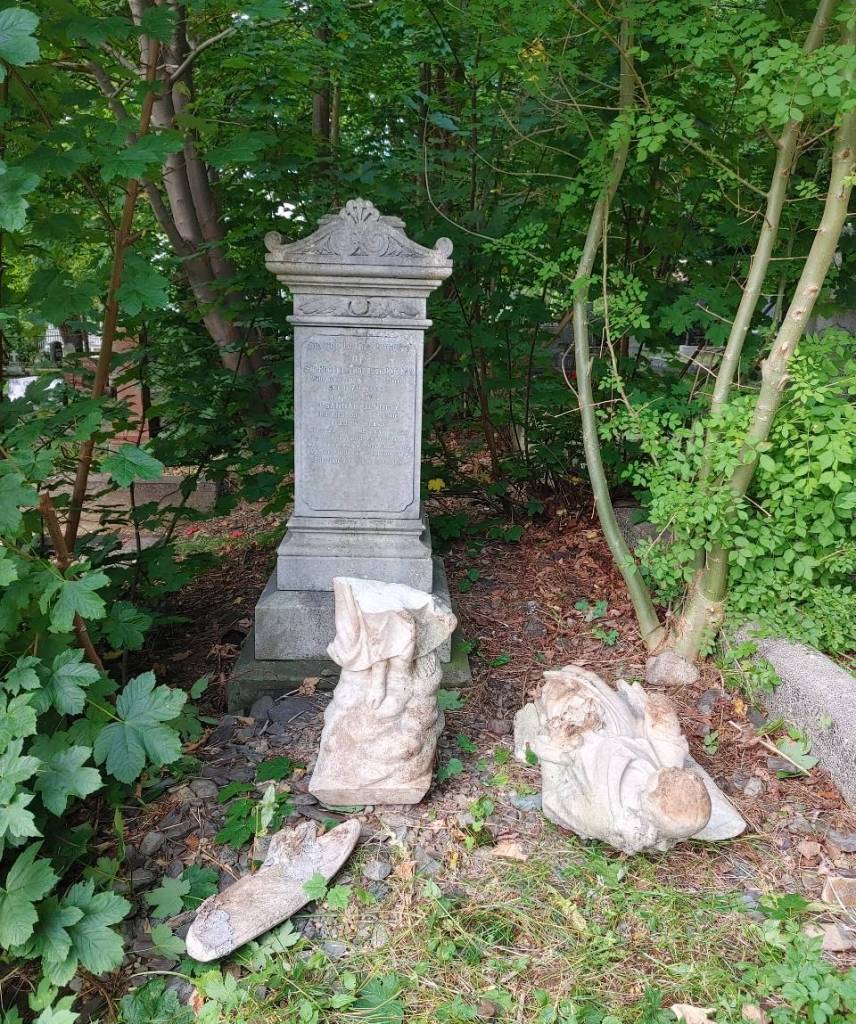
Monument in preparation for cleaning 
Thorburn monument complete!
The Fraser Monument
This monument is one that we actually visited in March 2021, on our first visit to the General Protestant Cemetery. I actually pointed at it and said ‘we can fix that’. Is that manifesting? If it is, we’ll take it! This monument has also seen several periods of restoration, but resetting the panels had failed again, so here we are! The monument consists of an ornate base with scrollwork, four exterior panels, a pillar (I’ve been calling it the obelisk, but it doesn’t have the pointy top), and an urn, all made from marble.
The first step was to remove the detached panel and remove as much of the failed adhesive as we could. It’s difficult to remove older adhesives sometimes, specifically if they are concrete, because they can pull off pieces of the soft marble with it! So you have to be extremely careful. Then we cleaned the entire monument using D/2 and water, and used stone epoxy to reattach the panel in place. Once all the epoxy was set and cured, we used a lime mortar to fill in any cracks, and rebuilt the top of one of the scrolls on the front of the monument, which was in quite a weathered state. We used some mortar to fill in cracks on the face of the pillar as well, as you can see a little in the last photo. This was just to provide some protection on the larger cracks from weathering, but I’m hoping for this kind of repair in the future, we can learn colour matching with mortar. There is always more to learn!
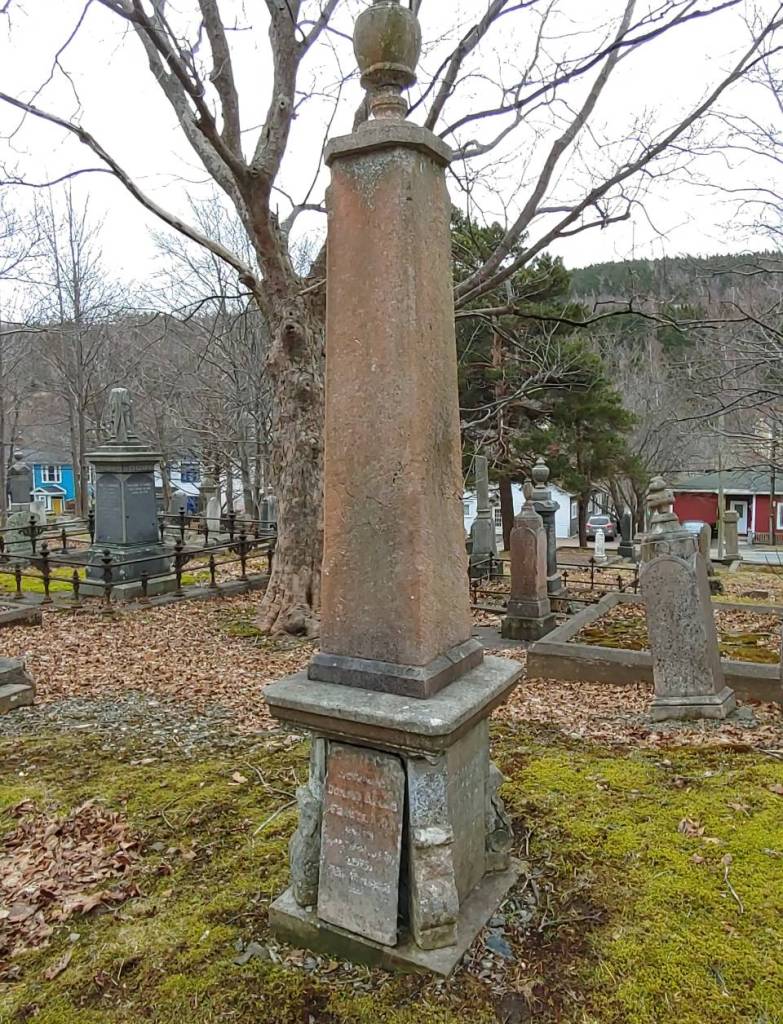
Fraser monument before cleaning and preservation 
After cleaning, before epoxy and mortar! 
The completed monument!
Thank you to everyone for following along with our projects and work, and for supporting what we do! We really appreciate it!
Keep following our blog and social media for more info on our projects, and if you are interested in working with us, please send us an email: blackcatpreservation@gmail.com

Awesome work and a noble cause! Thank you
LikeLiked by 1 person
Thank you so much for reading!
LikeLiked by 1 person